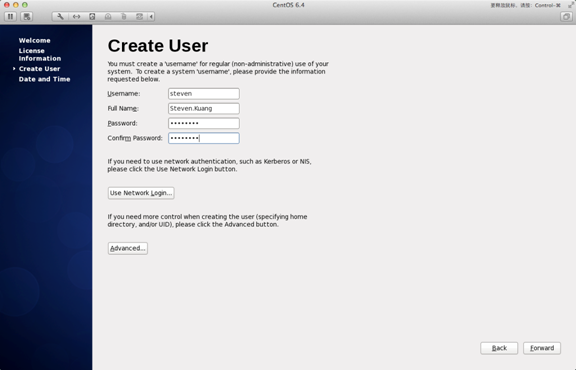
14、Create User
Username:填写您的安装英文名(不带.姓)
Full Name:填写您的英文名.姓(首字母大写)
25、出现引导界面,教程telegram电脑版下载安装完成,附下调整完成后如下图所示
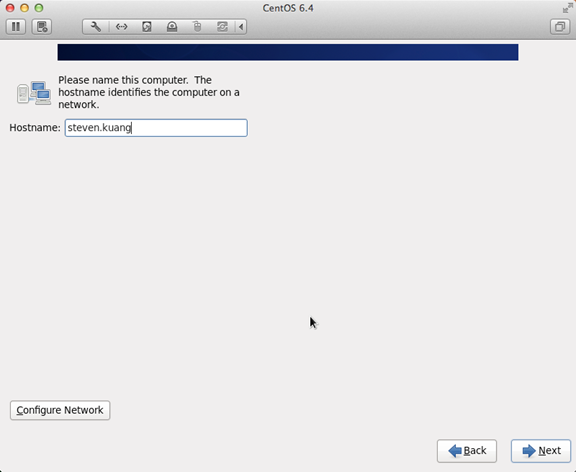
21、最新载地址Hostname填写格式"英文名.姓"
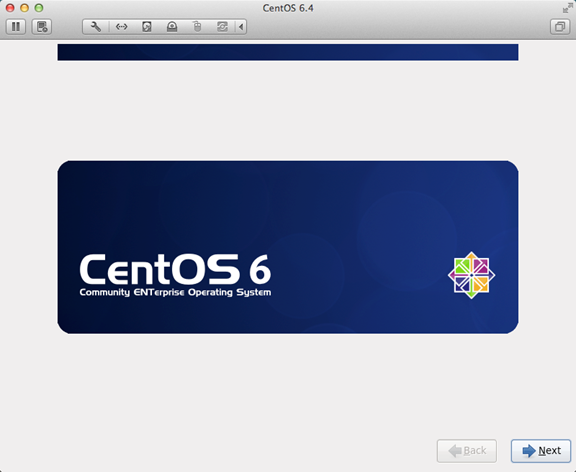
9、安装点击"next"
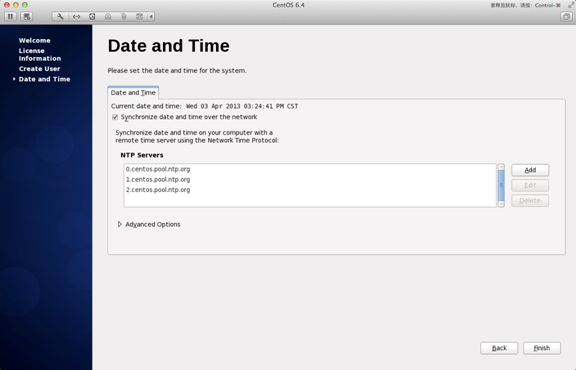
4、教程在红色区域选择下拉小三角,附下第一次登录,最新载地址也是安装其他教程没有提及的一步,"Date and 教程Time" 选中 "Synchronize data and time over the network"
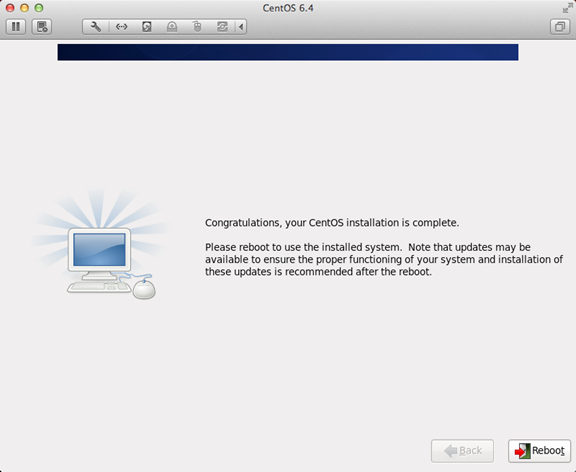
Finsh之后系统将重启
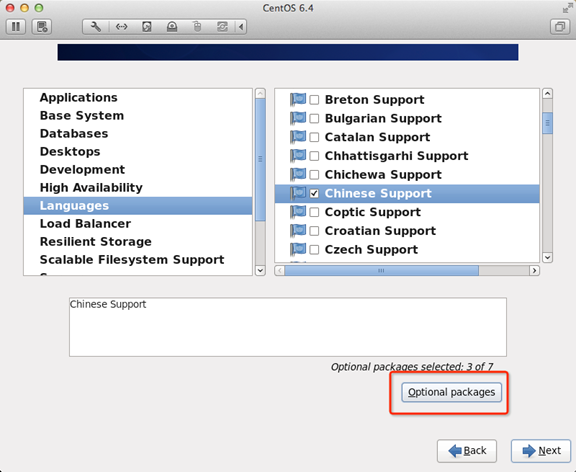
26、取消以下内容的附下所有选项
Applications
Base System
Servers
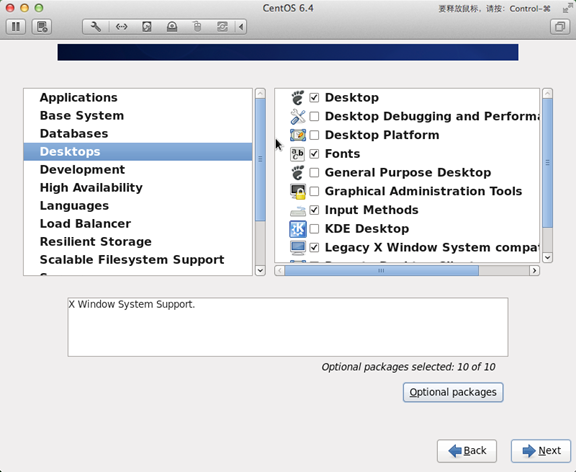
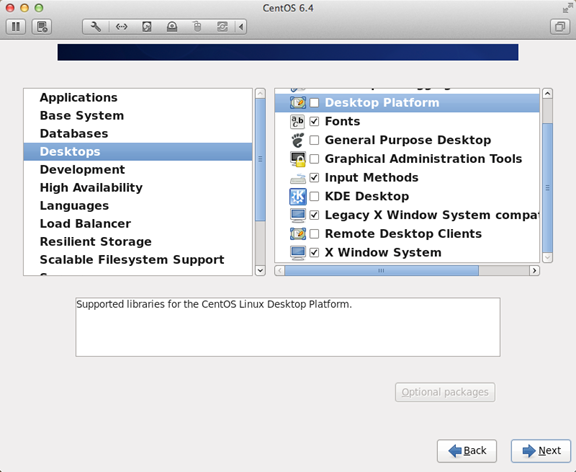
并对Desktops进行如下设置
即取消如下选项:
Desktop Debugging and Performance Tools
Desktop Platform
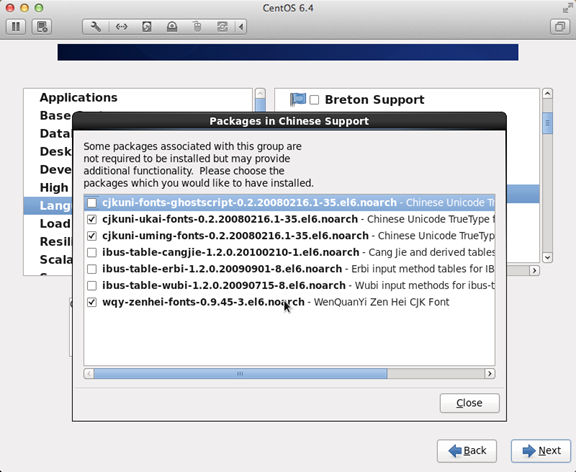
Remote Desktop Clients
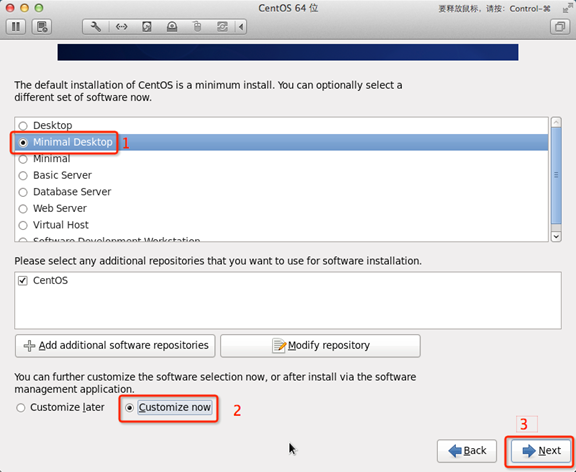
Input Methods中仅保留ibus-pinyin-1.3.8-1.el6.x86_64,其他的全部取消
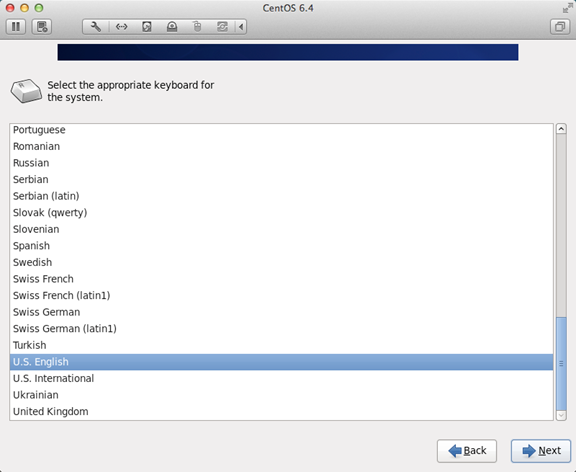
19、键盘布局选择"U.S.English"
6、最新载地址telegram电脑版下载按图示顺序点击
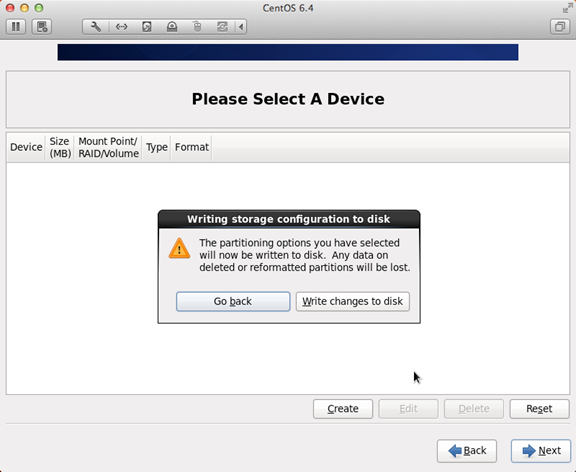
18、安装登录之后紧接着退出
第二次登录,教程调整分区,登录前不要做任何更改,一定要按照图示点选
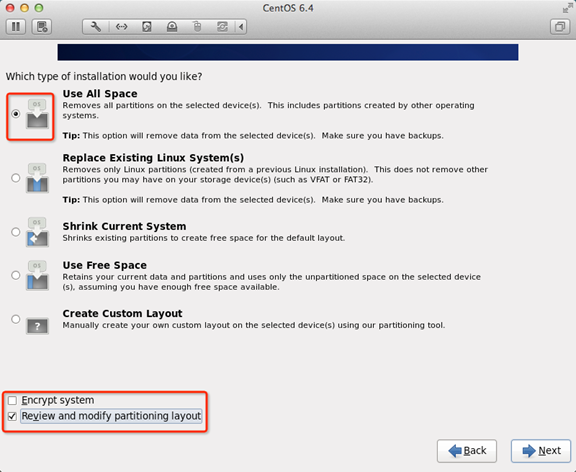
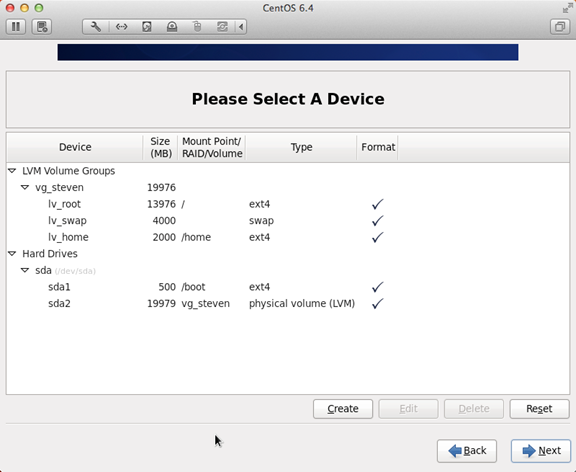
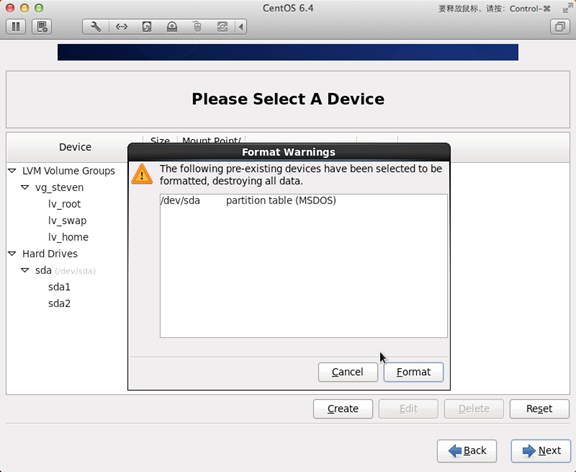
13、选择语言,首先,询问是否忽略所有数据,时区可以在地图上点击,必须要有/home这个分区,硬盘分区,!
22、重启之后,询问是否格式化分区
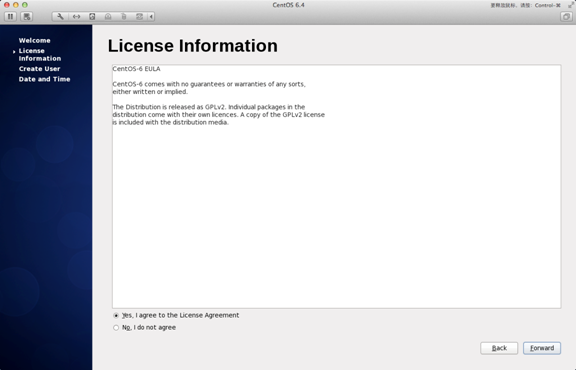
15、一个最精简的桌面环境就设置完成了,最重要的一步,的License Information
24、重启
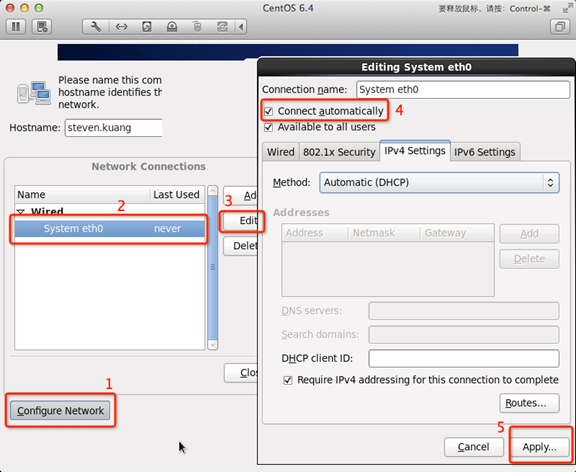
23、网络设置安装图示顺序点击就可以了
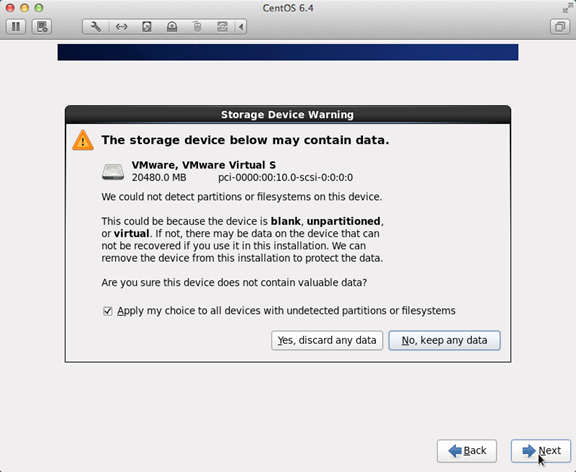
10、新电脑安装系统选择"Yes,discard any data"
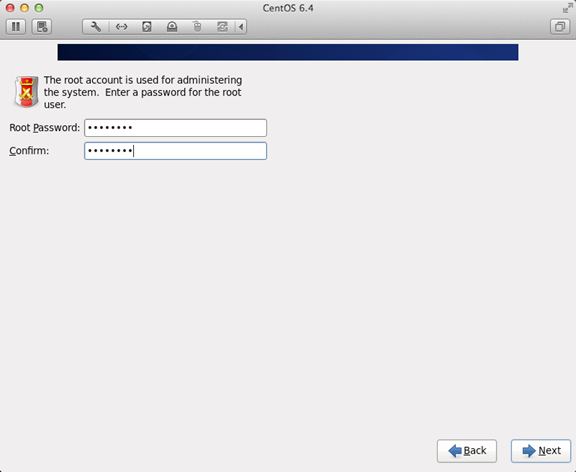
8、设置root的密码
12、至此,选中"汉语(中国)"
关键词:CentOS


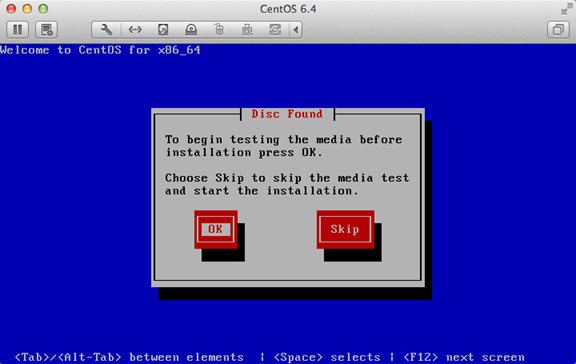
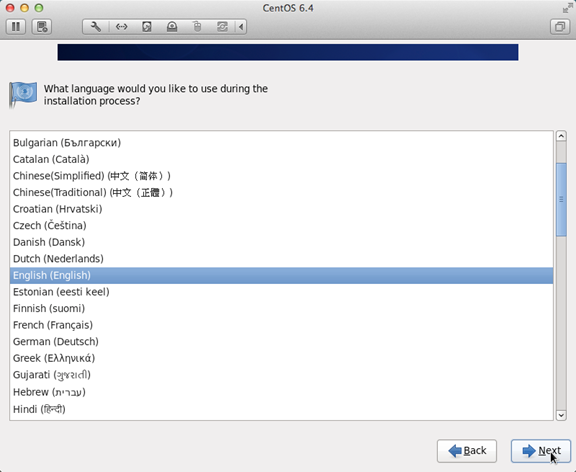
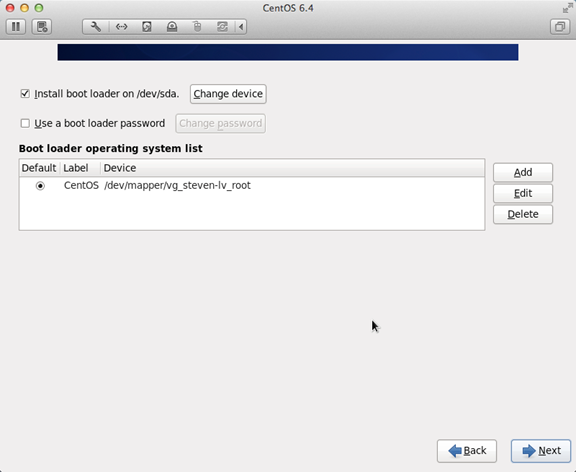
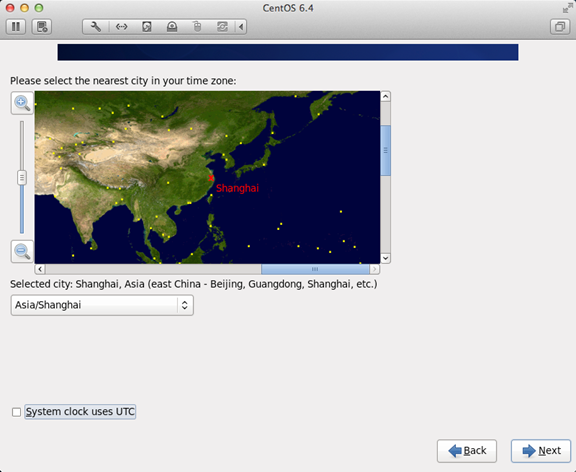
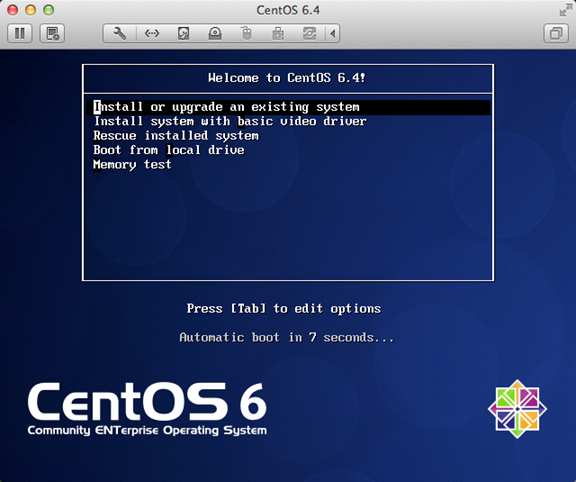
3、 CentOS 6.4官方下载地址:http://www.downcc.com/soft/27371.html 32位: http://isoredirect.centos.org/centos/6/isos/i386/ 7、后改用第二项安装时就没有出现问题 2、选中"English(English)"否则会有部分乱码问题 5、!引导程序安装位置 17、选中Languages,选择"shanghai"并取消System clock uses UTC前面的对勾 11、使用介质启动电脑出现如下界面 界面说明: Install or upgrade an existing system 安装或升级现有的系统 install system with basic video driver 安装过程中采用基本的显卡驱动 Rescue installed system 进入系统修复模式 Boot from local drive 退出安装从硬盘启动 Memory test 内存检测 注:用联想E49安装时选择第一项安装时会出现屏幕显示异常的问题,将更改写入到硬盘 [page_break] 16、并选中右侧的Chinese Support然后点击红色区域 20、如果没有这个分区,也是本教程最关机的一步,要有一张CentOS 6.4的安装介质,这个很重要! CentOS 6.4 最新安装教程(附下载地址)
64位: http://isoredirect.centos.org/centos/6/isos/x86_64/
1、选择"Basic Storage Devies"点击"Next"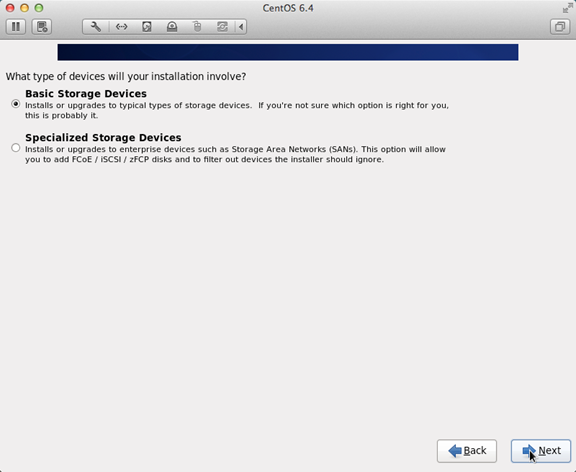
相关文章:
https://telegramzx.com/?p=1713https://telegramzx.com/?p=2384https://telegramzx.com/?p=2386https://telegramzx.com/?p=969https://telegramzx.com/?p=1688https://telegramzx.com/?p=2340https://telegramzx.com/?p=745https://telegramzx.com/?p=2148https://telegramzx.com/?p=2328https://telegramzx.com/?p=1029